반응형
코드 보완이 필요한 경우에는 아래 소스코드를 가지고 작업한다. 지금 코드는 온도 습도 센서에서 수집한 데이터를 보내고 있다.
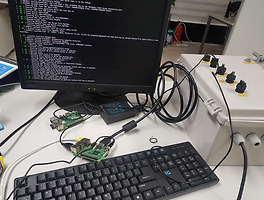
라즈베리파이 고정 IP 설정에 관한 것은 아래를 참고한다.
ifconfig 명령으로 현재 설정된 IP 주소를 확인한다. 아래 고정 IP 설정을 모두 수행하고 나서 조회 화면은 아래와 같다. 처음엔 모든 IP 주소가 보인다.
pi@raspberrypi:~ $ ifconfig
lo: flags=73<UP,LOOPBACK,RUNNING>  mtu 65536
        inet 127.0.0.1  netmask 255.0.0.0
        inet6 ::1  prefixlen 128  scopeid 0x10<host>
        loop  txqueuelen 1000  (Local Loopback)
        RX packets 42  bytes 2478 (2.4 KiB)
        RX errors 0  dropped 0  overruns 0  frame 0
        TX packets 42  bytes 2478 (2.4 KiB)
        TX errors 0  dropped 0 overruns 0  carrier 0  collisions 0

wlan0: flags=4163<UP,BROADCAST,RUNNING,MULTICAST>  mtu 1500
        inet 192.168.168.110  netmask 255.255.255.0  broadcast 192.168.168.255
        inet6 fe80::ba27:ebff:fe26:368c  prefixlen 64  scopeid 0x20<link>
        ether b8:27:eb:26:36:8c  txqueuelen 1000  (Ethernet)
        RX packets 6129  bytes 634877 (619.9 KiB)
        RX errors 0  dropped 0  overruns 0  frame 0
        TX packets 1257  bytes 197199 (192.5 KiB)
        TX errors 0  dropped 0 overruns 0  carrier 0  collisions 0

pi@raspberrypi:~ $
sudo nano /etc/network/interfaces 명령어를 이용해서, 앞서 ifconfig 명령어로 확인한 IP나 다은 주소로 고정 IP 세팅 편집할 때 wlan0 부분에 아래와 같이 수정 해준다.
* inet 뒤에 manual로 되어 있었으면 static으로 변경 필요
명령어는 sudo nano /etc/network/interfaces
# interfaces(5) file used by ifup(8) and ifdown(8)

# Please note that this file is written to be used with dhcpcd
# For static IP, consult /etc/dhcpcd.conf and 'man dhcpcd.conf'

# Include files from /etc/network/interfaces.d:
source-directory /etc/network/interfaces.d

auto lo
iface lo inet loopback

iface eth0 inet manual

allow-hotplug wlan0
iface wlan0 inet static
        wpa-conf /etc/wpa_supplicant/wpa_supplicant.conf
        address 192.168.35.50
        netmask 255.255.255.0
        gateway 192.168.35.1
        network 192.168.35.0
        broadcast 192.168.35.255
sudo nano /etc/wpa_supplicant/wpa_supplicant.conf 해서 아래 내용 확인 - 공유기 접속 시 사용한 Wifi ID/비번
  GNU nano 2.7.4                                                                                                                           File: /etc/wpa_supplicant/wpa_supplicant.conf

country=GB
ctrl_interface=DIR=/var/run/wpa_supplicant GROUP=netdev
update_config=1
country=US

network={
        ssid="SK_WiFiGIGAA988"
        psk="1806026356"
        key_mgmt=WPA-PSK
}
마지막으로 ubidots 접속해서 데이터 올려주는 프로그램이 라즈베리 파이가 부팅되면서 실행할 수 있도록 rc.local 파일을 아래와 같이 수정한다.
명령어는 sudo nano /etc/rc.local
#!/bin/sh -e
#
# rc.local
#
# This script is executed at the end of each multiuser runlevel.
# Make sure that the script will "exit 0" on success or any other
# value on error.
#
# In order to enable or disable this script just change the execution
# bits.
#
# By default this script does nothing.

# Print the IP address
_IP=$(hostname -I) || true
if [ "$_IP" ]; then
  printf "My IP address is %s\n" "$_IP"
fi

sudo python /home/pi/ubi_home_post.py &

exit 0
아래는 바로 위 rc.local 파일에 실행파일로 설정해 준 ubi_home_post.py 파일이다. 참고하시길.
import time
import requests
import math
import random
import datetime

import Adafruit_DHT

sensor = Adafruit_DHT.DHT11
pin = 4

TOKEN = "BBFF-mZjas1LeQMOt8Uvtpm4ZQGFNH0oWQV"  # Put your TOKEN here
#TOKEN = "BBFF-mZjas1LeQMOt8Uvtpm4ZQGFNH0oWQV"  # Put your TOKEN here
DEVICE_LABEL = "demo"  # Put your device label here
#DEVICE_LABEL = "homeraspi"
VARIABLE_LABEL_1 = "temp"  # Put your first variable label here
VARIABLE_LABEL_2 = "humi"  # Put your second variable label here
VARIABLE_LABEL_3 = "position"  # Put your second variable label here


def get_temphumi():
    #while True :
    h, t = Adafruit_DHT.read_retry(sensor, pin)
    if h is not None and t is not None :
        print("Temperature = {0:0.1f}*C Humidity = {1:0.1f}%".format(t, h))
    else :
        print('Read error')

    return t, h


def build_payload(variable_1, variable_2, variable_3):
    # Creates two random values for sending data
    #value_1 = random.randint(-10, 50)
    #value_2 = random.randint(0, 85)

    value_1, value_2 = get_temphumi()

    # Creates a random gps coordinates
    lat = random.randrange(34, 36, 1) + \
        random.randrange(1, 1000, 1) / 1000.0
    lng = random.randrange(-83, -87, -1) + \
        random.randrange(1, 1000, 1) / 1000.0
    payload = {variable_1: value_1,
               variable_2: value_2,
               variable_3: {"value": 1, "context": {"lat": lat, "lng": lng}}}

    return payload


def post_request(payload):
    # Creates the headers for the HTTP requests
    url = "http://industrial.api.ubidots.com"
    #url = "http://things.ubidots.com"
    url = "{}/api/v1.6/devices/{}".format(url, DEVICE_LABEL)
    headers = {"X-Auth-Token": TOKEN, "Content-Type": "application/json"}

    # Makes the HTTP requests
    status = 400
    attempts = 0
    while status >= 400 and attempts <= 5:
        req = requests.post(url=url, headers=headers, json=payload)
        status = req.status_code
        attempts += 1
        time.sleep(1)

    # Processes results
    if status >= 400:
        print("[ERROR] Could not send data after 5 attempts, please check \
            your token credentials and internet connection")
        return False

    print("[INFO] request made properly, your device is updated")
    return True


def main():
    now = datetime.datetime.now()

    payload = build_payload(
        VARIABLE_LABEL_1, VARIABLE_LABEL_2, VARIABLE_LABEL_3)

    print("[INFO] Attemping to send data")
    post_request(payload)
    print("[INFO] finished")
    nowDatetime = now.strftime('%Y-%m-%d %H:%M:%S')
    print(nowDatetime)


if __name__ == '__main__':
    while (True):
        main()
        time.sleep(60)
참고자료
2. ubidots - IoT Cloud Application

반응형
'개발자 > 라즈베리파이4' 카테고리의 다른 글
| Raspberry Pi Pico, 유연한 마이크로 컨트롤러 보드 (0) | 2021.01.29 |
|---|---|
| 팔로우해야 할 Top 10 Raspberry Pi 블로그 (0) | 2021.01.18 |
| 라즈베리파이 spi & i2c 동시에 사용 문제? (0) | 2021.01.15 |
| 10가지 Raspberry Pi 프로젝트 아이디어 (0) | 2021.01.13 |
| Raspberry Pi와 인터페이싱 MPU6050 (가속도계 + 자이로 스코프) (4) | 2020.11.30 |
| Raspberry Pi IO Interface Module Test (0) | 2020.11.27 |
| useradd 명령어로 리눅스 사용자 추가하기 (0) | 2020.11.25 |
| Raspberry Pi와 인터페이싱하는 GPS 모듈 (4) | 2020.11.24 |
더욱 좋은 정보를 제공하겠습니다.~ ^^