Nano 33 IoT 보드에서 아날로그 적외선 거리센서 (GP2Y0A21YK)
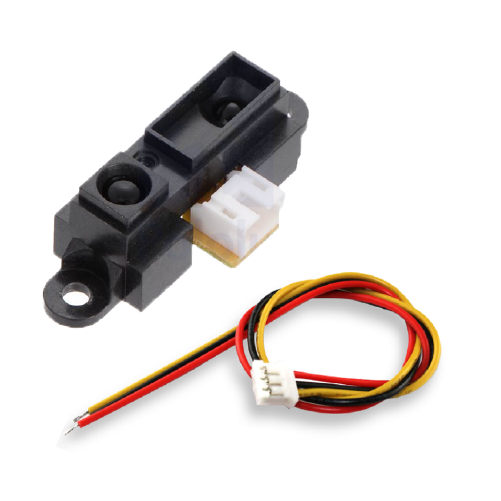
Sharp GP2Y0A21YK 거리 측정 센서입니다. 거리에 따라 아날로그 전압을 출력하며, 출력되는 전압을 바탕으로 거리를 측정할 수 있습니다.
특징 (Features) :
- GP2Y0A21YK 거리센서
- 아날로그 인터페이스
- 센서 케이블 포함
사양 (Specification) :
- 작동 전압: 4.5V ~ 5V
- 사용 전류: 40mA
- 측정 거리: 10~80cm
- 정밀도: 0.1cm
- 무게: 4g
센서의 상세한 내용은 아래에 첨부한 데이터북을 참고하십시오.
GP2Y0A21YK0F GP2Y0A21YK0F
Distance Measuring Sensor Unit
Measuring distance: 10 to 80 cm
Analog output type
센서의 외관 이미지입니다.

소스코드는 아래와 같습니다.
int ir_sensor = A0;

void setup() {
  Serial.begin(9600);          //시리얼 통신을 시작합니다.
}

void loop() {
  int distance = average_value(100);          //100번 반복하여 평균 값을 얻습니다.
  Serial.println(distance);             //센서 값을 출력합니다.
  delay(500);            //0.5초 대기
}

int average_value(int average_count) {
  int sum = 0;         //sum에 0을 입력합니다.
  for (int i=0; i<average_count; i++) {
    int sensor_value = analogRead(ir_sensor);           //센서 값을 판독합니다.
    int distance_cm = pow(3027.4/sensor_value, 1.2134);          //판독 값을 거리(cm)로 변환합니다.
    sum = sum + distance_cm;
  }
  return(sum/average_count);
}
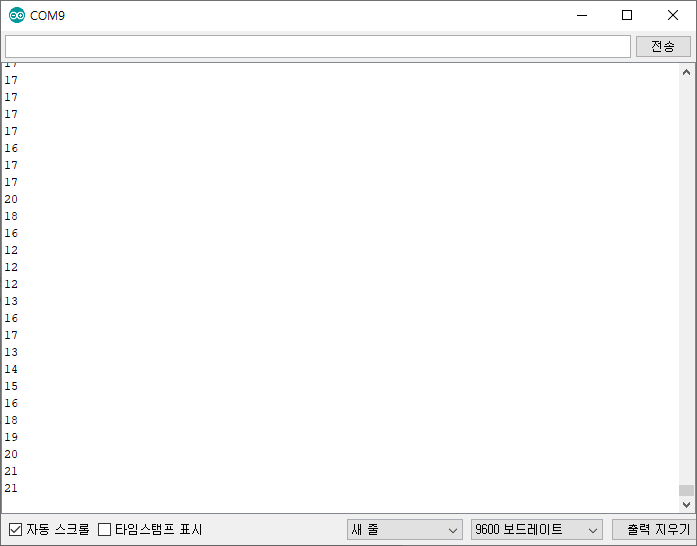
테스트 결과는 아래와 같습니다. 센서 출력이 마음에 들지 않아서 찾아보니 동작 전원이 4.5~5V입니다. 지금은 3.3V로 테스트하고 있어서 그런가 봅니다. 내일 다시 하기로 합니다. 그리고 display 선정도 해야 하고, 놀아야 하고 ^^

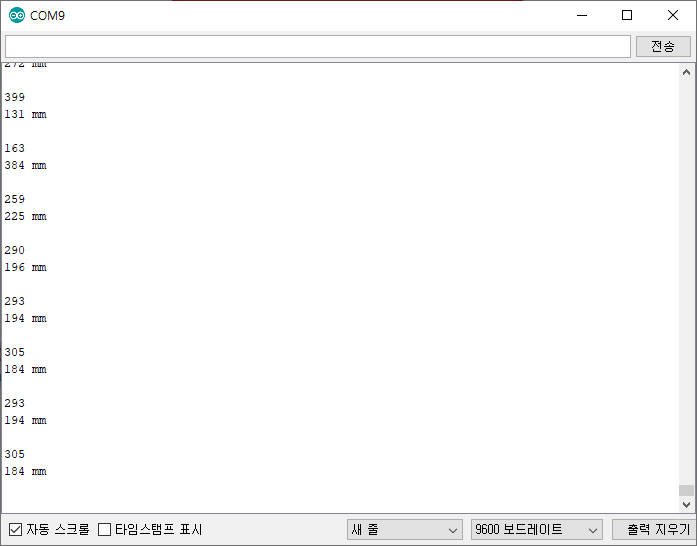
아래 코드도 참고 바랍니다. 다른 코드인데 결과는 덜 착잡합니다.
#define pin A0

void setup ()
{
  Serial.begin (9600);
  pinMode (pin, INPUT);
}

void loop ()

{

  uint16_t value = analogRead (pin);
  uint16_t range = get_gp2d12 (value);
  Serial.println (value);
  Serial.print (range);
  Serial.println (" mm");
  Serial.println ();
  delay (1000);
}

uint16_t get_gp2d12 (uint16_t value)
{
  if (value < 10) value = 10;
  return ((67870.0 / (value - 3.0)) - 40.0);
}
결과 화면입니다.

참고할 만한 코드 하나 더 출처 링크
#include <SoftwareSerial.h>

SoftwareSerial display(3, 2);
char cmstring[10];

void setup(void) {
  Serial.begin(9600);
  display.begin(9600);

  display.write(254); // move cursor to beginning of first line
  display.write(128);

  display.write("                "); // clear display
  display.write("                ");
}

void loop(void) {
  display.write(254); // move cursor to beginning of first line
  display.write(128);

  int reading = analogRead(A5);

  int calculated = (6762/(reading-9))-4;

  Serial.println(calculated);

  sprintf(cmstring, "%3d", calculated);
  display.write("distance: ");
  display.write(cmstring);
  display.write("cm");

  delay(200);
}
자꾸 이러는 이유를 모르겠네 ㅠ.ㅠ
int IRpin = A0;    //sets the IR sensor @pin 5
//defines the values
float IRvalue;
float IRdistance;
//setup command
void setup() {
  Serial.begin(9600); //starts the serial at 9600 baud rate
}
//loop command
void loop() {
  IRvalue = analogRead(IRpin);  //sets the IRvalue to read the IRpin
  Serial.println(IRvalue);
  IRdistance = 2076*pow(IRvalue, -11); //converts the distance to cm
  Serial.println(IRdistance);
  Serial.print("Distance = ");  //prints the distance measured in cm
  delay(100);  //delay of 100 milliseconds for every reading
}
'개발자 > Arduino' 카테고리의 다른 글
| Arduino IDE – 설정 및 시작 가이드 (0) | 2020.10.28 |
|---|---|
| nano 33 IoT에서 타이머 인터럽트 구현 참고 2 (0) | 2020.10.25 |
| nano 33 IoT에서 타이머 인터럽트 구현 참고 1 (0) | 2020.10.25 |
| OpenWeatherMap 날씨 정보를 OLED 에 디스플레이, Nano 33 IoT (2) | 2020.10.24 |
| nano 33 iot 보드 타이머 인터럽트 예제 (0) | 2020.10.20 |
| 스마트 팩토리 연결도와 소스코드 20201018 (0) | 2020.10.18 |
| Nano 33 IoT 데이터 서버 전송 Get 방식 (0) | 2020.10.13 |
| openweathermap 온도 데이터를 섭씨온도로 변환 (0) | 2020.10.13 |
취업, 창업의 막막함, 외주 관리, 제품 부재!
당신의 고민은 무엇입니까? 현실과 동떨어진 교육, 실패만 반복하는 외주 계약,
아이디어는 있지만 구현할 기술이 없는 막막함.
우리는 알고 있습니다. 문제의 원인은 '명확한 학습, 실전 경험과 신뢰할 수 있는 기술력의 부재'에서 시작됩니다.
이제 고민을 멈추고, 캐어랩을 만나세요!
코딩(펌웨어), 전자부품과 디지털 회로설계, PCB 설계 제작, 고객(시장/수출) 발굴과 마케팅 전략으로 당신을 지원합니다.
제품 설계의 고수는 성공이 만든 게 아니라 실패가 만듭니다. 아이디어를 양산 가능한 제품으로!
귀사의 제품을 만드세요. 교육과 개발 실적으로 신뢰할 수 있는 파트너를 확보하세요.
캐어랩


