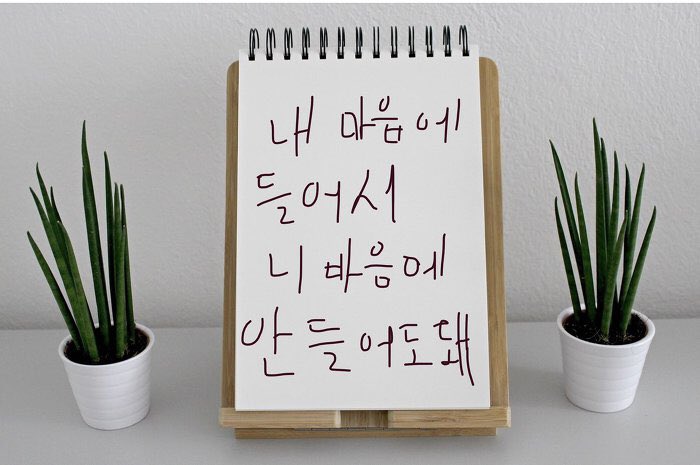
임베디드 프로그램을 짤 때는 대부분 사소한 코드로 시간을 다 잡아먹는다. % 하나 더 붙였다고, 아랫줄과 윗줄이 바뀌었다고 방금 전까지 잘 나오던 디스플레이가 안 나오는 경우도 있고, 마이크로 컨트롤러 내부에서 일어나는 일을 알지 못하니 에러가 나면 정확한 위치를 찾기도 어렵다. 이것저것 해보지 말아야 한다. 검증된 코드만 사용하고, 순서를 정확히 지킨다. 이런 과정을 정확히 배운 때가 있었다. 아마 가장 먼저 입사한 연구소에서 펌웨어와 C언어를 배웠을 때다.
훈련하는 날이 화, 목, 토로 정해져 있다. 반드시 지켜야 하는 훈련이라 달리러 나갈 때 날도 좋은 데 왜 달려요? 혹은 인생이 좀 힘들죠? 하는 질문은 등산하는 사람에게 왜 산에 올라가느냐는 질문과 같다. 마찬가지로 달리지 않을 때도 이유 없다. 오늘은 훈련 날인데 일하느라 가지 못했다. 겨우 퇴근했다. 시간을 어찌나 잘 낭비했는지 해야 할 일이 많다. 미루어서 못했고, 딴 데 신경을 쏟느라 못했고, 꿈꾸다가 세월을 보냈고, 새로운 개발 업무를 맡게 되어서 일이 많아졌다. 선배가 4시 반경에 전화를 해서 술 먹자고 부르는데 일이 많다고 나가지 않았다. 낭비를 할 수 있는 데까지 하면 그다음부터 낭비를 줄이게 된다.
여기까지가 돌아가는 코드다. 센서에서 데이터를 읽어서 Oled에 결과를 화면에 뿌려준다. 남은 일은 수집한 센서 데이터를 클라우드로 전송하는 일인데 상대방 개발자에게 설명을 들어도 잘 모르겠다. 일단 찾아보고 하나씩 하자. 원칙은 쉽게 변하지 않는다. 42.195km 마라톤 풀코스도 한 걸음씩이고, 잉어가 물 만난 듯 골인을 넣는 손흥민도 동료 선수로부터 공을 받아야 한다. 가장 단순한 것을 익혀 반복적으로 확장한다.
/*
 * Arduino with LM35 analog temperature sensor and SSD1306 OLED display.
 * This is a free software with NO WARRANTY.
 * https://simple-circuit.com/
 */

#include <Wire.h>              // include Arduino wire library (required for I2C devices)
#include <Adafruit_GFX.h>      // include Adafruit graphics library
#include <Adafruit_SSD1306.h>  // include Adafruit SSD1306 OLED display driver
#include <SimpleDHT.h>

#define OLED_RESET  4    // define display reset pin
Adafruit_SSD1306 display(OLED_RESET);

//#define SCREEN_WIDTH 128 // OLED display width, in pixels
//#define SCREEN_HEIGHT 64 // OLED display height, in pixels

// define DHT11 pin connection
int pinDHT11 = 9;
SimpleDHT11 dht11;

void setup(void)
{
  delay(1000);  // wait a second

  //Serial.begin(9600);
  // initialize the SSD1306 OLED display with I2C address = 0x3D
  display.begin(SSD1306_SWITCHCAPVCC, 0x3C);

  // clear the display buffer.
  display.clearDisplay();

  display.setTextSize(1);   // text size = 1
  display.setTextColor(WHITE, BLACK);  // set text color to white and black background
  display.setCursor(15, 0);            // move cursor to position (15, 0) pixel
  display.print("Device Status");
  display.display();        // update the display
  display.setTextSize(2);   // text size = 2
}

void loop()
{
  to_oled_temphumidata();

  data_send();
}

void data_send()
{

}

char _buffer[8];

void to_oled_temphumidata()
{
  byte temperature = 0;
  byte humidity = 0;

  if (dht11.read(pinDHT11, &temperature, &humidity, NULL)) {
    Serial.print("Read DHT11 failed.");
    return;
  }

  display.setCursor(23, 10);
  sprintf(_buffer, "%d C", (int)temperature);
  display.print(_buffer);

  display.setCursor(23, 30);
  sprintf(_buffer, "%d /", (int)humidity);
  display.print(_buffer);

  //display.setCursor(23, 50);
  //printf(_buffer, "On/Off");
  //display.print("On/Off");

  display.drawCircle(88, 12, 2, WHITE);
  //display.drawCircle(88, 32, 2, WHITE);

  // update the display
  display.display();

  // DHT11 sampling rate is 1HZ.
  delay(2000);
}


void to_oled_temphumidata_test()
{
  byte temperature = 0;
  byte humidity = 0;
  if (dht11.read(pinDHT11, &temperature, &humidity, NULL)) {
    Serial.print("Read DHT11 failed.");
    return;
  }

  Serial.print("Sample OK: ");
  Serial.print((int)temperature); Serial.print(" *C, ");
  Serial.print((int)humidity); Serial.println(" %");

  // DHT11 sampling rate is 1HZ.
  delay(2000);

}


// end of code.


'개발자 > Arduino' 카테고리의 다른 글
| Decoding and Encoding JSON with Arduino Nano 33 IoT 2 (0) | 2020.10.09 |
|---|---|
| ArduinoJson 데이터의 Decoding / Ecoding 예제 (0) | 2020.10.08 |
| format을 가진 출력을 위한 sprintf( ), dtostrf( ) (0) | 2020.10.07 |
| SSD1306 OLED 로 LM35 온도센서 값을 디스플레이 (0) | 2020.10.07 |
| Nano 33 IoT 보드 온도 습도 센서 dht11 테스트 (0) | 2020.10.06 |
| Nano 33 IoT 보드 간단한 서버 만들고 AP로 동작 (0) | 2020.10.03 |
| Nano 33 IoT 보드 WiFi 스캔 코드 (0) | 2020.10.03 |
| nano 33 IoT 보드에 0.96 ssd1306 i2c OLED 연결하기 (0) | 2020.09.29 |
취업, 창업의 막막함, 외주 관리, 제품 부재!
당신의 고민은 무엇입니까? 현실과 동떨어진 교육, 실패만 반복하는 외주 계약,
아이디어는 있지만 구현할 기술이 없는 막막함.
우리는 알고 있습니다. 문제의 원인은 '명확한 학습, 실전 경험과 신뢰할 수 있는 기술력의 부재'에서 시작됩니다.
이제 고민을 멈추고, 캐어랩을 만나세요!
코딩(펌웨어), 전자부품과 디지털 회로설계, PCB 설계 제작, 고객(시장/수출) 발굴과 마케팅 전략으로 당신을 지원합니다.
제품 설계의 고수는 성공이 만든 게 아니라 실패가 만듭니다. 아이디어를 양산 가능한 제품으로!
귀사의 제품을 만드세요. 교육과 개발 실적으로 신뢰할 수 있는 파트너를 확보하세요.
캐어랩


