이 예제에서 간단한 웹 서버를 사용하면 웹을 통해 LED를 깜박일 수 있습니다. 이 예에서는 beginAP( ) 함수를 사용하여 로컬 WiFI 네트워크에 의존하지 않고 액세스 포인트를 설정합니다. 이 예제는 WiFi 모듈의 IP 주소를 Arduino 소프트웨어 (IDE) 직렬 모니터에 나타냅니다. 보드의 IP 주소를 알고 나면 웹 브라우저에서 해당 주소를 열어 Nano 33 IoT 보드의 13번 BuilrIn LED를 켜고 끌 수 있습니다. 보드의 IP 주소가 yourAddress 인 경우 :
http://yourAddress/H는 LED를 켭니다.
http://yourAddress/L는 LED를 끕니다.
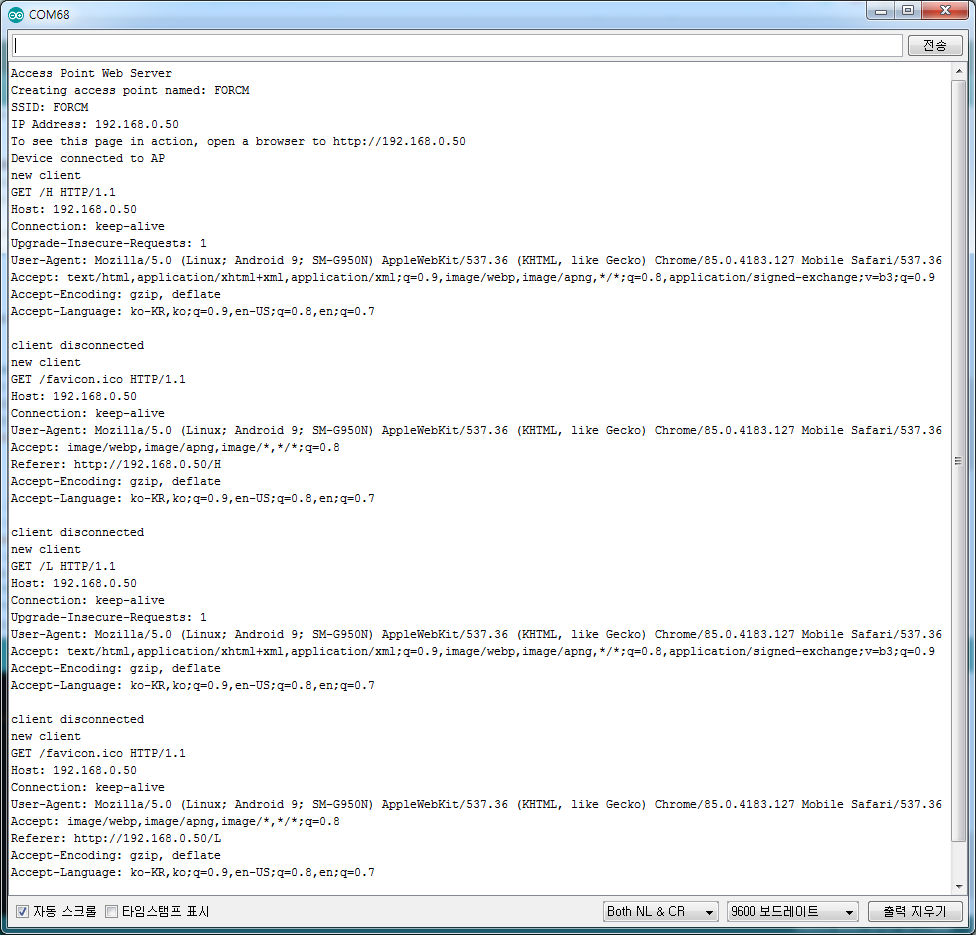
서버로 동작하는 씨리얼 모니터 화면은 다음과 같습니다.

아래 소스코드를 보면 arduino_secret.h 에 WiFi의 ssid와 password를 넣습니다.
#define SECRET_SSID "MYWIFI"
#define SECRET_PASS "1234567890"
56Line 에서 네트워크에서 서버로 사용할 IP주소를 임의로 할당해줍니다.
소스코드는 nano-ap.ino 코드를 아래에 올립니다. 코드 출처는 AP Simple Web Server WiFi 링크를 알립니다.
/*
  WiFi Web Server LED Blink

  A simple web server that lets you blink an LED via the web.
  This sketch will create a new access point (with no password).
  It will then launch a new server and print out the IP address
  to the Serial monitor. From there, you can open that address in a web browser
  to turn on and off the LED on pin 13.

  If the IP address of your board is yourAddress:
    http://yourAddress/H turns the LED on
    http://yourAddress/L turns it off

  created 25 Nov 2012
  by Tom Igoe
  adapted to WiFi AP by Adafruit
 */

#include <SPI.h>
#include <WiFiNINA.h>
#include "arduino_secrets.h"
///////please enter your sensitive data in the Secret tab/arduino_secrets.h
char ssid[] = SECRET_SSID;        // your network SSID (name)
char pass[] = SECRET_PASS;    // your network password (use for WPA, or use as key for WEP)
int keyIndex = 0;                // your network key Index number (needed only for WEP)

int led =  LED_BUILTIN;
int status = WL_IDLE_STATUS;
WiFiServer server(80);

void setup() {
  //Initialize serial and wait for port to open:
  Serial.begin(9600);
  while (!Serial) {
    ; // wait for serial port to connect. Needed for native USB port only
  }

  Serial.println("Access Point Web Server");

  pinMode(led, OUTPUT);      // set the LED pin mode

  // check for the WiFi module:
  if (WiFi.status() == WL_NO_MODULE) {
    Serial.println("Communication with WiFi module failed!");
    // don't continue
    while (true);
  }

  String fv = WiFi.firmwareVersion();
  if (fv < "1.0.0") {
    Serial.println("Please upgrade the firmware");
  }

  // by default the local IP address of will be 192.168.4.1
  // you can override it with the following:
  // WiFi.config(IPAddress(10, 0, 0, 1));

  // print the network name (SSID);
  Serial.print("Creating access point named: ");
  Serial.println(ssid);

  // Create open network. Change this line if you want to create an WEP network:
  status = WiFi.beginAP(ssid, pass);
  if (status != WL_AP_LISTENING) {
    Serial.println("Creating access point failed");
    // don't continue
    while (true);
  }

  // wait 10 seconds for connection:
  delay(10000);

  // start the web server on port 80
  server.begin();

  // you're connected now, so print out the status
  printWiFiStatus();
}


void loop() {
  // compare the previous status to the current status
  if (status != WiFi.status()) {
    // it has changed update the variable
    status = WiFi.status();

    if (status == WL_AP_CONNECTED) {
      // a device has connected to the AP
      Serial.println("Device connected to AP");
    } else {
      // a device has disconnected from the AP, and we are back in listening mode
      Serial.println("Device disconnected from AP");
    }
  }

  WiFiClient client = server.available();   // listen for incoming clients

  if (client) {                             // if you get a client,
    Serial.println("new client");           // print a message out the serial port
    String currentLine = "";                // make a String to hold incoming data from the client
    while (client.connected()) {            // loop while the client's connected
      if (client.available()) {             // if there's bytes to read from the client,
        char c = client.read();             // read a byte, then
        Serial.write(c);                    // print it out the serial monitor
        if (c == '\n') {                    // if the byte is a newline character

          // if the current line is blank, you got two newline characters in a row.
          // that's the end of the client HTTP request, so send a response:
          if (currentLine.length() == 0) {
            // HTTP headers always start with a response code (e.g. HTTP/1.1 200 OK)
            // and a content-type so the client knows what's coming, then a blank line:
            client.println("HTTP/1.1 200 OK");
            client.println("Content-type:text/html");
            client.println();

            // the content of the HTTP response follows the header:
            client.print("Click <a href=\"/H\">here</a> turn the LED on<br>");
            client.print("Click <a href=\"/L\">here</a> turn the LED off<br>");

            // The HTTP response ends with another blank line:
            client.println();
            // break out of the while loop:
            break;
          }
          else {      // if you got a newline, then clear currentLine:
            currentLine = "";
          }
        }
        else if (c != '\r') {    // if you got anything else but a carriage return character,
          currentLine += c;      // add it to the end of the currentLine
        }

        // Check to see if the client request was "GET /H" or "GET /L":
        if (currentLine.endsWith("GET /H")) {
          digitalWrite(led, HIGH);               // GET /H turns the LED on
        }
        if (currentLine.endsWith("GET /L")) {
          digitalWrite(led, LOW);                // GET /L turns the LED off
        }
      }
    }
    // close the connection:
    client.stop();
    Serial.println("client disconnected");
  }
}

void printWiFiStatus() {
  // print the SSID of the network you're attached to:
  Serial.print("SSID: ");
  Serial.println(WiFi.SSID());

  // print your WiFi shield's IP address:
  IPAddress ip = WiFi.localIP();
  Serial.print("IP Address: ");
  Serial.println(ip);

  // print where to go in a browser:
  Serial.print("To see this page in action, open a browser to http://");
  Serial.println(ip);

}
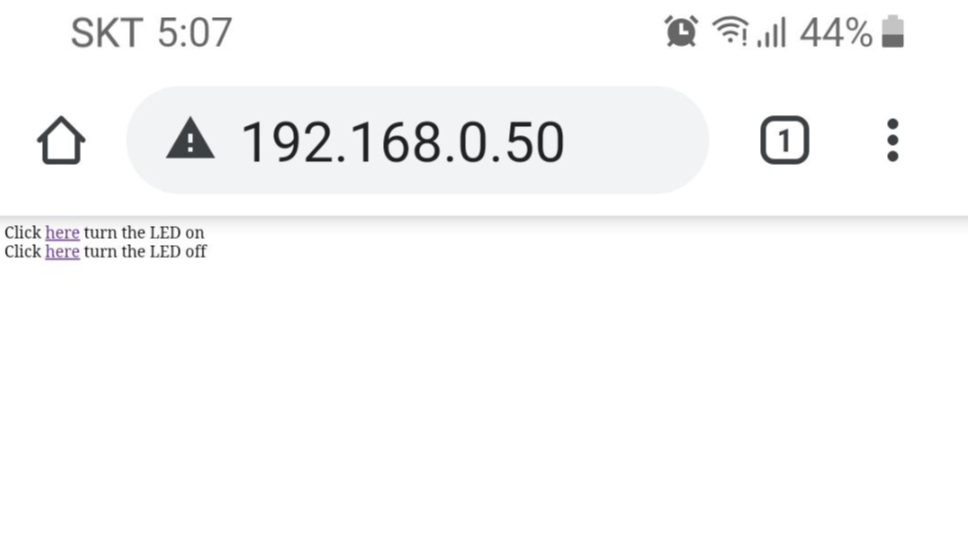
코드를 컴파일, 업로드하여 실행하면 위 첨부 그림과 같이 연결 화면이 씨리얼 모니터에 보여지고, 웹 브라우저에서 서버주소를 접속하면 매뉴얼 화면이 보입니다. 스마트 폰으로 http://192.168.0.50으로 접속하면 서버 화면도 잘 보이고 LED를 키거나 끄는 동작도 잘 되는데 PC나 노트북의 크롬에서 접속하면 잘 되지 않습니다. 아래는 스마트 폰 연결 화면입니다.
스마트 폰에 연결해 동작할 때 씨리얼 화면입니다. 참고하십시요.
여기까지 테스트를 잘 하고, 어디로 놀러 갈까?
'개발자 > Arduino' 카테고리의 다른 글
| format을 가진 출력을 위한 sprintf( ), dtostrf( ) (0) | 2020.10.07 |
|---|---|
| SSD1306 OLED 로 LM35 온도센서 값을 디스플레이 (0) | 2020.10.07 |
| 달리기와 술자리도 마다하고, 여기까지 돌아가는 코드 (0) | 2020.10.06 |
| Nano 33 IoT 보드 온도 습도 센서 dht11 테스트 (0) | 2020.10.06 |
| Nano 33 IoT 보드 WiFi 스캔 코드 (0) | 2020.10.03 |
| nano 33 IoT 보드에 0.96 ssd1306 i2c OLED 연결하기 (0) | 2020.09.29 |
| ssd1306 Oled 화면 안 나올 때 점검 사항 (0) | 2020.09.29 |
| Arduino nano 33 IoT 특별한 LSM6DS3 Library (0) | 2020.09.25 |
취업, 창업의 막막함, 외주 관리, 제품 부재!
당신의 고민은 무엇입니까? 현실과 동떨어진 교육, 실패만 반복하는 외주 계약,
아이디어는 있지만 구현할 기술이 없는 막막함.
우리는 알고 있습니다. 문제의 원인은 '명확한 학습, 실전 경험과 신뢰할 수 있는 기술력의 부재'에서 시작됩니다.
이제 고민을 멈추고, 캐어랩을 만나세요!
코딩(펌웨어), 전자부품과 디지털 회로설계, PCB 설계 제작, 고객(시장/수출) 발굴과 마케팅 전략으로 당신을 지원합니다.
제품 설계의 고수는 성공이 만든 게 아니라 실패가 만듭니다. 아이디어를 양산 가능한 제품으로!
귀사의 제품을 만드세요. 교육과 개발 실적으로 신뢰할 수 있는 파트너를 확보하세요.
캐어랩


