온도 습도 센서 연결도는 아래와 같습니다.

Arduino 프로그래밍
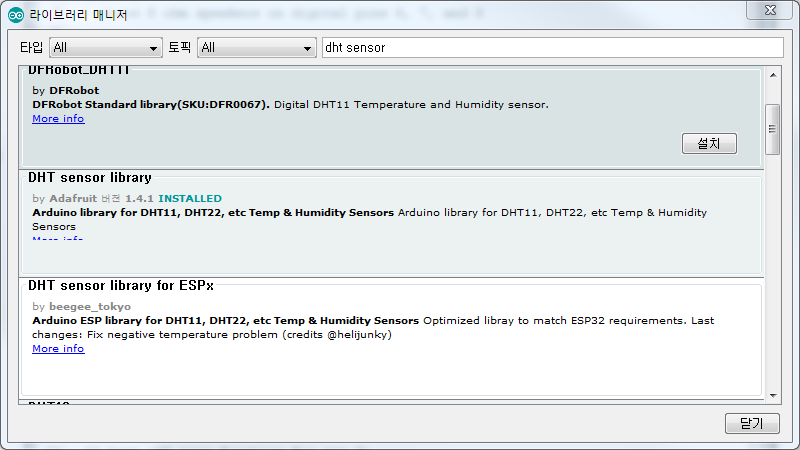
Arduino IDE 소프트웨어가 실행되고 있어야 합니다 . 다음으로 Arduino 라이브러리 관리자를 통해 수행할 수 있는 DHT 센서 라이브러리를 설치해야 합니다. 스케치 화면에서 툴 → 라이브러리 관리자 → 라이브러리 관리 창을 열어서 검색 필드에 " dht zsensor"를 입력 하고 " Adafruit 의 DHT 센서 라이브러리 " 목록을 살펴봅니다 .
"설치" 버튼을 클릭하거나 이전 버전에서 "업데이트"를 클릭합니다.

소스코드
#include "DHT.h"

#define DHTPIN 2     // Digital pin connected to the DHT sensor

// Uncomment whatever type you're using!
//#define DHTTYPE DHT11   // DHT 11
#define DHTTYPE DHT22   // DHT 22  (AM2302), AM2321
//#define DHTTYPE DHT21   // DHT 21 (AM2301)

DHT dht(DHTPIN, DHTTYPE);

void setup() {
  Serial.begin(9600);
  Serial.println(F("DHTxx test!"));

  dht.begin();
}

void loop() {
  // Wait a few seconds between measurements.
  delay(2000);

  // Reading temperature or humidity takes about 250 milliseconds!
  // Sensor readings may also be up to 2 seconds 'old' (its a very slow sensor)
  float h = dht.readHumidity();
  // Read temperature as Celsius (the default)
  float t = dht.readTemperature();
  // Read temperature as Fahrenheit (isFahrenheit = true)
  float f = dht.readTemperature(true);

  // Check if any reads failed and exit early (to try again).
  if (isnan(h) || isnan(t) || isnan(f)) {
    Serial.println(F("Failed to read from DHT sensor!"));
    return;
  }

  // Compute heat index in Fahrenheit (the default)
  float hif = dht.computeHeatIndex(f, h);
  // Compute heat index in Celsius (isFahreheit = false)
  float hic = dht.computeHeatIndex(t, h, false);

  Serial.print(F("Humidity: "));
  Serial.print(h);
  Serial.print(F("%  Temperature: "));
  Serial.print(t);
  Serial.print(F("°C "));
  Serial.print(f);
  Serial.print(F("°F  Heat index: "));
  Serial.print(hic);
  Serial.print(F("°C "));
  Serial.print(hif);
  Serial.println(F("°F"));
}
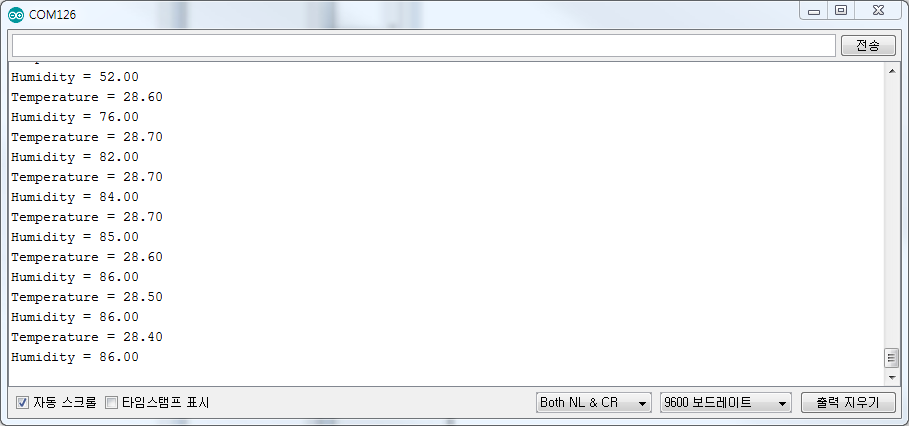
위 소스코드의 결과는 아래와 같습니다.

씨리얼 플로터 기능을 사용하기 위해 코드를 단순하게 만들었어요. 아래 코드를 카피하고 붙여넣으세요.
#include "DHT.h"
#define DHTPIN 2     // Digital pin connected to the DHT sensor

#define DHTTYPE DHT11   // DHT 11
//#define DHTTYPE DHT22   // DHT 22  (AM2302), AM2321
//#define DHTTYPE DHT21   // DHT 21 (AM2301)

DHT dht(DHTPIN, DHTTYPE);

void setup() {
  Serial.begin(9600);
  Serial.println("temp, Humi");

  dht.begin();
}

void loop() {
  // Wait a few seconds between measurements.
  delay(2000);


  int temp = (int)dht.readTemperature();
  int humi = (int)dht.readHumidity();


  Serial.print(temp); //온도값 시리얼 모니터에 출력
  Serial.print(',');
  Serial.println(humi); //습도: 출력


}
위 코드로 씨리얼 모니터와 씨리얼 플로터로 출력한 결과입니다. 손으로 만지거나 입김을 불면 온도가 변화하는 것을 확인하실 수 있습니다.


참고
'개발자 > Arduino' 카테고리의 다른 글
| 아두이노 서보모터 제어 SG90 기초부터 전문가 까지 (1) | 2022.10.21 |
|---|---|
| 아두이노 전체 라이브러리 5103개 (1) | 2022.10.01 |
| 4 digit 7 segment up down 카운터 만들기 (0) | 2022.05.02 |
| 아두이노 7 Segment LED 숫자 표시 (0) | 2022.04.13 |
| 아두이노 포모도로 시계 만들기 (0) | 2022.04.11 |
| Arduino Uno로 ATtiny13 프로그래밍 (0) | 2022.04.07 |
| 아두이노 우노 보드와 브레드 보드 고정 아크릴 받침 (0) | 2022.04.07 |
| 아두이노 가변 저항 7-segment 에 표시하기 smart knob (0) | 2022.04.04 |
취업, 창업의 막막함, 외주 관리, 제품 부재!
당신의 고민은 무엇입니까? 현실과 동떨어진 교육, 실패만 반복하는 외주 계약,
아이디어는 있지만 구현할 기술이 없는 막막함.
우리는 알고 있습니다. 문제의 원인은 '명확한 학습, 실전 경험과 신뢰할 수 있는 기술력의 부재'에서 시작됩니다.
이제 고민을 멈추고, 캐어랩을 만나세요!
코딩(펌웨어), 전자부품과 디지털 회로설계, PCB 설계 제작, 고객(시장/수출) 발굴과 마케팅 전략으로 당신을 지원합니다.
제품 설계의 고수는 성공이 만든 게 아니라 실패가 만듭니다. 아이디어를 양산 가능한 제품으로!
귀사의 제품을 만드세요. 교육과 개발 실적으로 신뢰할 수 있는 파트너를 확보하세요.
캐어랩


