아래에 소개하는 인터넷 브라우저를 통해 액츄에이터를 제어하는 가장 간단한 방법은 인터넷이 되는 집안이나 사무실, 어떤 공간에서도 쉽게 모터나, 팬, 다른 액츄에이터를 쉽게 제어할 수 있는 방법이다. 너무 간단해서 기절할 지도 모른다.
How to Control Smart Farm Actuator from Chrome Browser
라즈베리 파이를 브라우저를 통해 원격제어 하는 가장 간단한 방법을 실습해보자. 서버는 파이썬을 기반으로 한 SimpleHTTPServer 구현하고, 클라이언트는 부라우저의 메시지 전송방식중에 하나인 POST 방식을 이용하여 웹 서버를 경유하여 스마트 농장 액츄에이터를 제어하는 방식이다.
필요한 파일은 controlServer.py와 index.html 파일 두 개다. 파이선 프로그램은 서버 프로그램 기능을 수행하고, 인텍스 파일은 버튼을 그려준다. 일단 코드부터 살펴본다.
index.html 파일
<html>
    <head>
        <meta charset="UTF-8">
        <title>Smart Farm actuator control</title>
        <meta name="viewport" content="width=200, initial-scale=1, maximum-scale=1">
    </head>

    <body>
    <p style="text-align:center; clear: none; float: none;">스마트 농장 액츄에이터 제어 실습</p>
    	<div align="center" style="margin: 0 0 10px 10px">
            <ul >
                <input type="button" style=font-size:10pt;width:70;height:60; value="pump on" onClick="cmd('PUMPON')">
				<input type="button" style=font-size:10pt;width:70;height:60; value="pump off" onClick="cmd('PUMPOFF')">
            </ul>
			<ul >
                <input type="button" style=font-size:10pt;width:70;height:60; value="fan on" onClick="cmd('FANON')">
				<input type="button" style=font-size:10pt;width:70;height:60; value="fan off" onClick="cmd('FANOFF')">
            </ul>

			<ul >
                <input type="button" style=font-size:10pt;width:70;height:60; value="motor on" onClick="cmd('MOTORON')">
				<input type="button" style=font-size:10pt;width:70;height:60; value="motor off" onClick="cmd('MOTOROFF')">
            </ul>

			<ul >
                <input type="button" style=font-size:10pt;width:70;height:60; value="rgb led on" onClick="cmd('RGBON')">
				<input type="button" style=font-size:10pt;width:70;height:60; value="rgb led off" onClick="cmd('RGBOFF')">
            </ul>


        </div>

        <script type="text/javascript">
            function cmd(value) {
                if( window.XMLHttpRequest ) {
                    request = new XMLHttpRequest();
                }

                if( !request ) {
                    alert("XMLHttpRequest Error");
                    return false;
                }

                var send = 'cmd=' + value;
                request.open('POST','/rccar',true);

                request.setRequestHeader('Content-Type', 'application/x-www-form-urlencoded');
                request.setRequestHeader('Content-Length', send.length);
                request.setRequestHeader('Connection', 'close');
                request.send(send);
            }
        </script>
    </body>
</html>
서버로 돌아가는 controlServer.py 코드
import cgi
import RPi.GPIO as gpio
from BaseHTTPServer import HTTPServer
from SimpleHTTPServer import SimpleHTTPRequestHandler

#Actuator define BCM GPIO Pin - is not wiringPi Pin number
PUMP = 5
FAN = 6
MOTOR = 13
RGB = 19

RED = 4
GREEN = 3
BLUE = 2

class Handler(SimpleHTTPRequestHandler):
    def do_POST(self):
        if self.path == '/rccar':
            form = cgi.FieldStorage(fp=self.rfile,
                                    headers=self.headers,
                                    environ={'REQUEST_METHOD':'POST'})
            cmd = form['cmd'].value
            print cmd

            if cmd == "PUMPON":
                gpio.output(PUMP, gpio.HIGH)
            elif cmd == "PUMPOFF":
				gpio.output(PUMP, gpio.LOW)
            elif cmd == "FANON":
				gpio.output(FAN, gpio.HIGH)
            elif cmd == "FANOFF":
				gpio.output(FAN, gpio.LOW)
            elif cmd == "MOTORON":
				gpio.output(MOTOR, gpio.HIGH)
            elif cmd == "MOTOROFF":
				gpio.output(MOTOR, gpio.LOW)
            elif cmd == "RGBON":
				gpio.output(RGB, gpio.HIGH)
				gpio.output(RED, gpio.HIGH)
				gpio.output(GREEN, gpio.HIGH)
				gpio.output(BLUE, gpio.HIGH)
            elif cmd == "RGBOFF":
				gpio.output(RGB, gpio.LOW)

            self.send_response(100)
            self.send_header('Content-type', 'text/html')

            return

        return self.do_GET()

gpio.setwarnings(False)
gpio.setmode( gpio.BCM )

#Pin Output Setup
gpio.setup(PUMP, gpio.OUT)
gpio.setup(FAN, gpio.OUT)
gpio.setup(MOTOR, gpio.OUT)
gpio.setup(RGB, gpio.OUT)

gpio.setup(RED, gpio.OUT)
gpio.setup(GREEN, gpio.OUT)
gpio.setup(BLUE, gpio.OUT)

#Pin Initialization
gpio.output(PUMP, gpio.LOW)
gpio.output(FAN, gpio.LOW)
gpio.output(MOTOR, gpio.LOW)
gpio.output(RGB, gpio.LOW)

gpio.output(RED, gpio.LOW)
gpio.output(GREEN, gpio.LOW)
gpio.output(BLUE, gpio.LOW)


server = HTTPServer(('', 8002), Handler).serve_forever()
라즈베리파이에서 폴더를 만들고 위 두 파일을 생성한다. 네트워크에 연결된 라즈베리파이에서 controlServer.py 를 아래와 같은 명령어로 실행한다.
$sudo python controlServer.py
실행을 하였으면 크롬 브라우저를 열어 주소줄에 다음과 같이 입력한다.
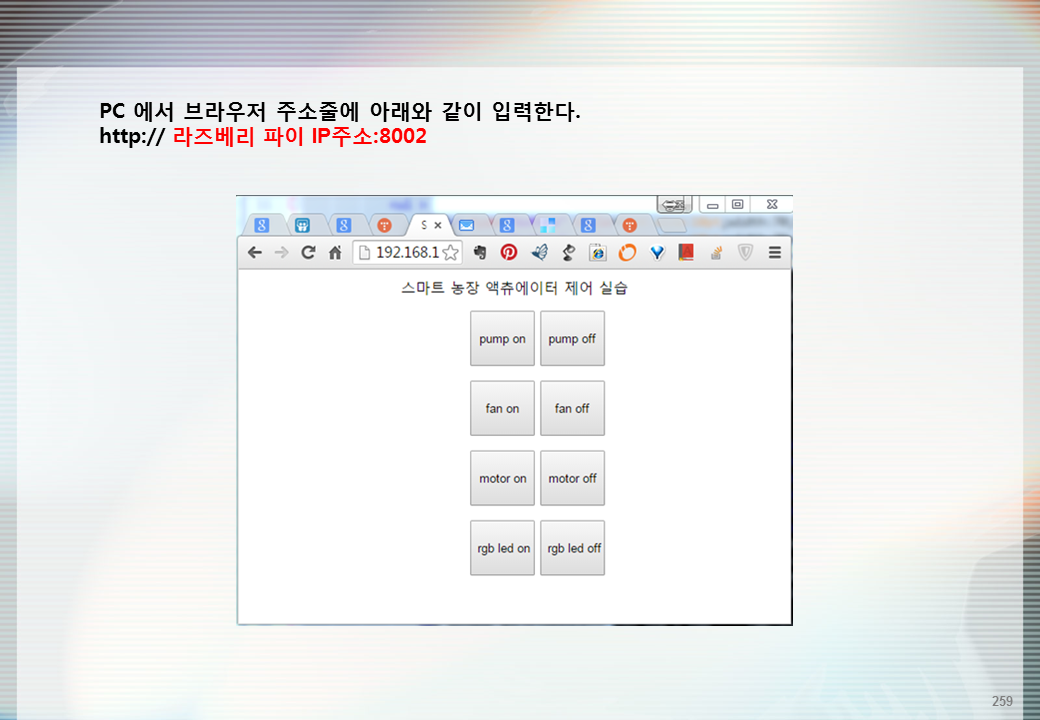
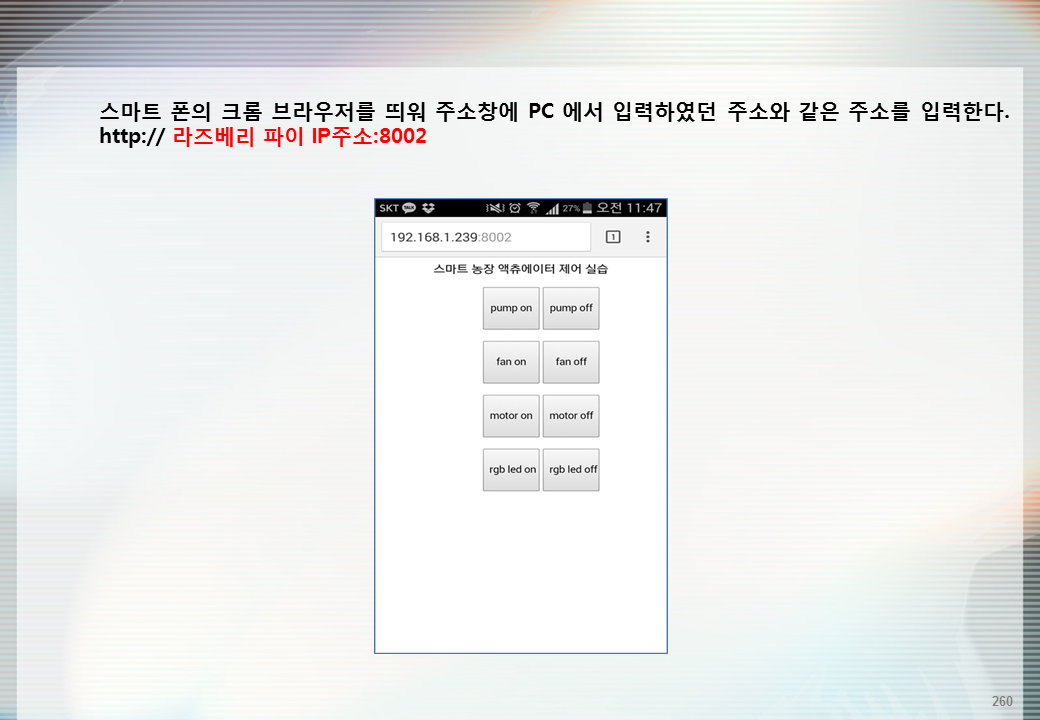
라즈베리파이 IP 주소:8002 를 입력하면 아래 그림과 같이 인텍스 파일이 만들어 준 버튼이 나타난다. 버튼을 누르면 보드의 액츄에이터가 잘 동작함을 확인할 수 있다. 이렇게 PC 브라우저에서 되면 스마트 폰에서도 마찬가지로 브라우저를 열어 제어할 수 있다. 아주 환상적인 기능 아닌가?

아래는 스마트폰에서 실행한 화면이다.

아래는 서버에서 실행하는 콘솔 화면 내용이다.
pi@raspberrypi:~/farmactubrowser $ sudo python controlServer.py
192.168.0.4 - - [16/May/2022 09:49:44] "GET / HTTP/1.1" 200 -
192.168.0.4 - - [16/May/2022 09:49:44] code 404, message File not found
192.168.0.4 - - [16/May/2022 09:49:44] "GET /favicon.ico HTTP/1.1" 404 -
PUMPON
192.168.0.4 - - [16/May/2022 09:49:45] "POST /rccar HTTP/1.1" 100 -
FANON
192.168.0.4 - - [16/May/2022 09:50:05] "POST /rccar HTTP/1.1" 100 -
MOTORON
192.168.0.4 - - [16/May/2022 09:50:06] "POST /rccar HTTP/1.1" 100 -
RGBON
192.168.0.4 - - [16/May/2022 09:50:07] "POST /rccar HTTP/1.1" 100 -
RGBOFF
192.168.0.4 - - [16/May/2022 09:50:29] "POST /rccar HTTP/1.1" 100 -
MOTOROFF
192.168.0.4 - - [16/May/2022 09:50:30] "POST /rccar HTTP/1.1" 100 -
FANOFF
192.168.0.4 - - [16/May/2022 09:50:30] "POST /rccar HTTP/1.1" 100 -
PUMPOFF
새로운 날!
아이가 왔으니 더욱 집중하고 전진하기로 한다. 시간이 지나보면 아무것도 아닌 게 나이, 돈, 사랑한 사람이다. 당시에는 절박했지만 이루고 나면 무언가 허무한 것들이다. 물론 삶은 모든 게 헛되다고 하지만 후회하지 않는 것은 책 읽는 것, 운동하는 것, 여행하는 것, 돈 버는 것은 후회하지 않는다고 한다. 무얼 해도 후회하고 하지 않아도 후회한다고 했을 때 후회하지 않는 일에 더 많은 시간을 보낸다.

'개발자 > 라즈베리파이4' 카테고리의 다른 글
| 라즈베리파이 4 조도 센서, 빛 센서 실습 (0) | 2022.05.25 |
|---|---|
| 라즈베리파이 4 근접 센서 실습 코드 (0) | 2022.05.23 |
| 라즈베리파이4 데이터베이스 브라우저 연동 테스트 에러 해결 (0) | 2022.05.22 |
| 라즈베리파이4 데이터베이스 연동 php 에러 보이게 (0) | 2022.05.22 |
| 라즈베리파이 4 인체감지 센서 실습 코드 (0) | 2022.05.19 |
| MQ-135 Air quality hazardous gas sensor module (0) | 2022.05.18 |
| 라즈베리파이 4 초음파 센서 실습 코드 (0) | 2022.05.17 |
| Raspberry Pi Pico 마이크로 컨트롤러 보드 (0) | 2022.05.17 |
취업, 창업의 막막함, 외주 관리, 제품 부재!
당신의 고민은 무엇입니까? 현실과 동떨어진 교육, 실패만 반복하는 외주 계약,
아이디어는 있지만 구현할 기술이 없는 막막함.
우리는 알고 있습니다. 문제의 원인은 '명확한 학습, 실전 경험과 신뢰할 수 있는 기술력의 부재'에서 시작됩니다.
이제 고민을 멈추고, 캐어랩을 만나세요!
코딩(펌웨어), 전자부품과 디지털 회로설계, PCB 설계 제작, 고객(시장/수출) 발굴과 마케팅 전략으로 당신을 지원합니다.
제품 설계의 고수는 성공이 만든 게 아니라 실패가 만듭니다. 아이디어를 양산 가능한 제품으로!
귀사의 제품을 만드세요. 교육과 개발 실적으로 신뢰할 수 있는 파트너를 확보하세요.
캐어랩


