라즈베리파이 화면캡쳐 방법
예전에는 scrot라는 리눅스 툴을 다운로드하여서 라즈비안에 설치해야만 사용이 가능했지만 요즘은 라즈비안에 기본적으로 포함되어 있어서 별도의 다운로드 및 설치를 하실 필요가 없습니다. 화면을 캡처하기 위해서는 먼저 터미널을 열어서 scrot 명령을 입력하여 스크린샷을 찍어줍니다. 아래와 같이 전체 화면이 그대로 캡처됩니다. 혹시 scrot 명령이 듣지 않으면 아래 명령어로 설치합니다. 간단합니다.
$ sudo apt install scrot
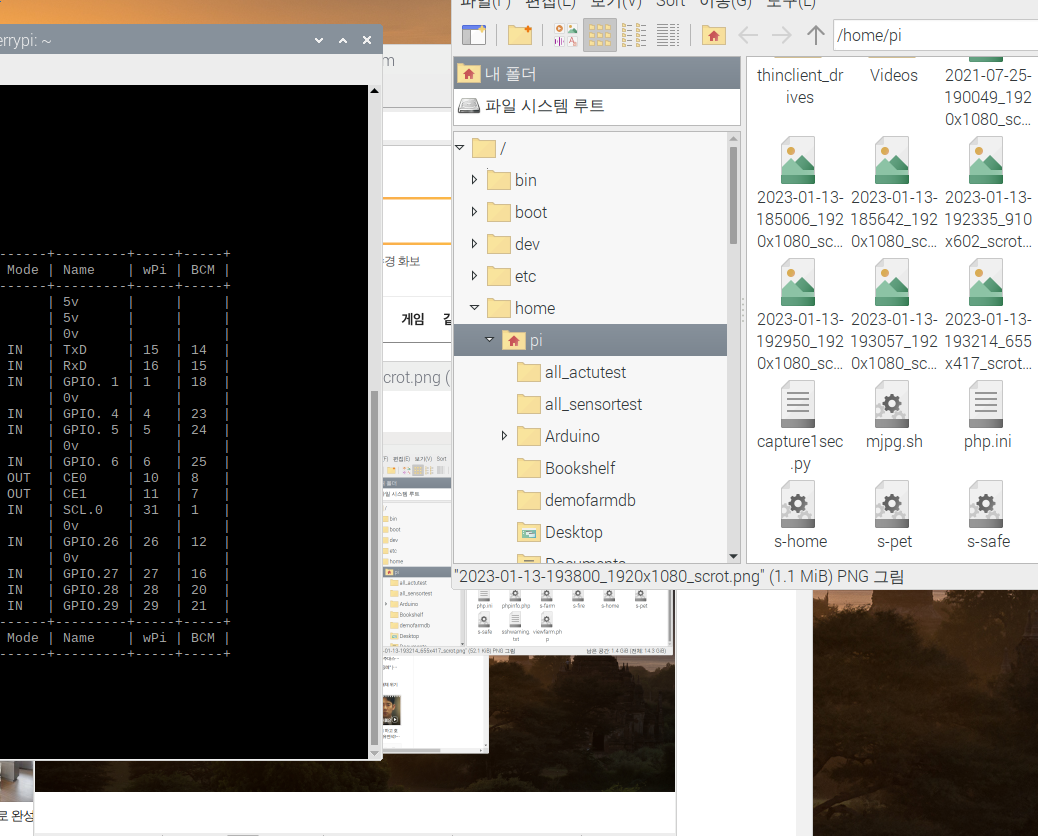
캡처 화면의 저장 위치는 루트 폴더인 '/home/pi'입니다.

위 이미지는 키보드의 'Print Screen'키를 눌려 화면을 캡처한 이미지입니다.
다음은 특정 윈도우나 선택 영역을 마우스로 드래그 앤 드롭하여 스크린샷을 찍는 방법입니다.
옵션을 주어 아래와 같이 터미널에 입력해 보겠습니다.
$scrot -s
터미널에 'scrot -s'를 입력한 후 엔터키를 치고 곧바로 캡처하고 싶은 영역을 마우스로 드래그 앤 드롭하거나 열려진 윈도우 활성창을 클릭하게 되면 아래와 같이 이미지를 캡처할 수 있습니다.

scrot에는 다양한 옵션이 있는데 터미널에서 'scrot -h'를 통해 전체 옵션 내용을 확인할 수 있습니다.
$scrot -h
pi@raspberrypi:~ $ scrot -h
Usage : scrot [OPTIONS]... [FILE]
  Where FILE is the target file for the screenshot.
  If FILE is not specified, a date-stamped file will be dropped in the
  current directory.
  See man scrot for more details
  -h, --help                display this help and exit
  -v, --version             output version information and exit
  -a, --autoselect          non-interactively choose a rectangle of x,y,w,h
  -b, --border              When selecting a window, grab wm border too
  -c, --count               show a countdown before taking the shot
  -d, --delay NUM           wait NUM seconds before taking a shot
  -e, --exec APP            run APP on the resulting screenshot
  -q, --quality NUM         Image quality (1-100) high value means
                            high size, low compression. Default: 75.
                            For lossless compression formats, like png,
                            low quality means high compression.
  -m, --multidisp           For multiple heads, grab shot from each
                            and join them together.
  -s, --select              interactively choose a window or rectangle
                            with the mouse
  -u, --focused             use the currently focused window
  -t, --thumb NUM           generate thumbnail too. NUM is the percentage
                            of the original size for the thumbnail to be,
                            or the geometry in percent, e.g. 50x60 or 80x20.
  -z, --silent              Prevent beeping

  SPECIAL STRINGS
  Both the --exec and filename parameters can take format specifiers
  that are expanded by scrot when encountered.
  There are two types of format specifier. Characters preceded by a '%'
  are interpreted by strftime(2). See man strftime for examples.
  These options may be used to refer to the current date and time.
  The second kind are internal to scrot  and are prefixed by '$'
  The following specifiers are recognised:
                  $f image path/filename (ignored when used in the filename)
                  $m thumbnail path/filename
                  $n image name (ignored when used in the filename)
                  $s image size (bytes) (ignored when used in the filename)
                  $p image pixel size
                  $w image width
                  $h image height
                  $t image format
                  $$  prints a literal '$'
                  \n prints a newline (ignored when used in the filename)
  Example:
          scrot '%Y-%m-%d_$wx$h_scrot.png' -e 'mv $f ~/images/shots/'
          Creates a file called something like 2000-10-30_2560x1024_scrot.png
          and moves it to your images directory.

This program is free software see the file COPYING for licensing info.
Copyright Tom Gilbert 2000
Email bugs to <scrot_sucks@linuxbrit.co.uk>
pi@raspberrypi:~ $
-u는 포커스, -d는 delay, -c는 카운트다운 등 유용한 옵션이 많이 있는 것을 확인하실 수 있습니다. 물론 옵션을 아래와 같이 사용하면 옵션을 조합해서 다양한 캡처 이미지를 추출할 수 있습니다.
pi@raspberrypi:~$ scrot -ud 5
위 명령은 활성화된 창을 5초 뒤에 캡처하는 옵션 조합 예시입니다. 터미널에서 입력을 하고 대기하면 5초 뒤에 터미널 창이 캡처가 되고 다른 창을 캡처하고 싶다면 명령 입력 후 엔터키를 누른 다음에 캡처하고 싶은 창을 한 번 클릭하여 활성화시키면 선택한 창이 캡처됩니다.
참고로 라즈베리파이 라즈비안에 scrot 툴이 설치되어 있지 않다면 아래와 같이 직접 scrot 툴을 다운로드하여서 설치할 수도 있습니다.
pi@raspberrypi:~$ sudo apt -get install scrot
패키지 다운로드가 완료되면 위에서 정리했던 내용을 동일하게 사용하실 수 있습니다. scrot는 다른 리눅스에서도 동일하게 사용할 수 있다는 사항도 참고해 볼만 합니다. 지금까지 라즈베리파이에서 다양한 화면 캡처 방법에 대해서 정리해 보았습니다.
참고

'개발자 > 라즈베리파이4' 카테고리의 다른 글
| 아쿠아포닉스 센서 모니터링 Atlas IoT 설치 따라하기 (0) | 2023.01.26 |
|---|---|
| 라즈베리파이 USB 카메라 2대 영상 출력 (0) | 2023.01.26 |
| Raspberry Pi4 Node.js 최신 버전 업데이트 (0) | 2023.01.25 |
| 아쿠아포닉스 Whitebox T3 MkII for Raspberry Pi, model T3.21 (0) | 2023.01.20 |
| Raspberry Pi 화면 캡쳐 방법 (0) | 2023.01.17 |
| 라즈베리파이 카메라 모듈 V3 요약 (0) | 2023.01.16 |
| giblib error: Can't open X display. 에러 해결 방법 (0) | 2023.01.13 |
| 라즈베리파이3 B+ libcamera 설치 (0) | 2023.01.11 |
취업, 창업의 막막함, 외주 관리, 제품 부재!
당신의 고민은 무엇입니까? 현실과 동떨어진 교육, 실패만 반복하는 외주 계약,
아이디어는 있지만 구현할 기술이 없는 막막함.
우리는 알고 있습니다. 문제의 원인은 '명확한 학습, 실전 경험과 신뢰할 수 있는 기술력의 부재'에서 시작됩니다.
이제 고민을 멈추고, 캐어랩을 만나세요!
코딩(펌웨어), 전자부품과 디지털 회로설계, PCB 설계 제작, 고객(시장/수출) 발굴과 마케팅 전략으로 당신을 지원합니다.
제품 설계의 고수는 성공이 만든 게 아니라 실패가 만듭니다. 아이디어를 양산 가능한 제품으로!
귀사의 제품을 만드세요. 교육과 개발 실적으로 신뢰할 수 있는 파트너를 확보하세요.
캐어랩


